
Here’s how a busy London housewife with no previous growing experience grew over 3 ounces of premium cannabis in her back garden.
Carmella is a 42 year old mother that works a busy events job in town and leads a hectic social life.
She loves a smoke but finds much London weed too strong, expensive and random, with dealers not always being the most reliable of people.
Carmella got in touch and a few emails later she began to grow.
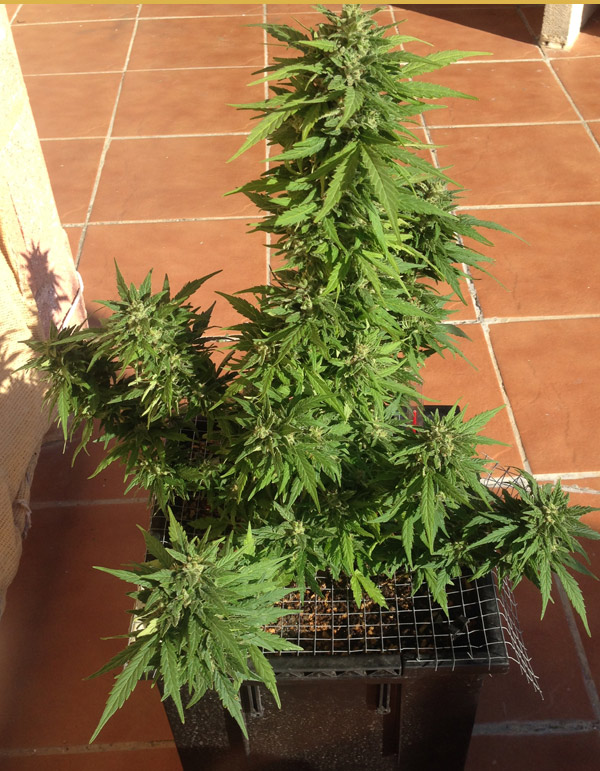
After an investment of 75 days and £45 she was looking at 3 ounces of fragrant top quality bud which would have cost her £750. People at Glastonbury bothered her for it.
You too can:
- Grow ounces of quality bud outdoors
- Do this organically, without using chemicals or special equipment
- Harvest a product with high monetary value
- Say goodbye to your dealer
Using these step by step instructions you, like Carmella can grow amazing weed in your garden with ease.
Autoflowers have come on in leaps and bounds and over 5 years of development has delivered some outstanding varieties – so much so that some people only grow autos. Times have changed and now a total beginner can grow outstanding cannabis with little effort by following these simple steps.
Autoflowering cannabis or ‘Autos’ don’t require any special light conditions, they just flower a certain number of days following germination, regardless of light changes and normally in 70-80 days.
This guide is for outdoor growing but will work fine indoors.
Contents:
Step 1 – Carefully choose your location

Autos need as much sun as you can give to them. Choose your growing space wisely.
Remember it is quite normal for people to use poly tunnels and coverings for plants anyway – if you are worried about the appearance of the plants from a distance you can mix them up with other plants, or covering them with a mesh cage or semi transparent cover of some sort can also help to make plant identification difficult from a distance.
Watch the area at different times and try to find somewhere that gets plenty of morning light if possible – the more the better. And bear in mind that the sun will get higher in the sky as summer goes on change the direction of light slightly.
If you have pets you may need to restrict access to the plants, cats have been known to trash seedlings by digging into soil and dogs can be clumsy with their tails.
In the UK I would recommend starting your grow in late May or June.
Step 2 – Choose and order your autoflower seeds
I knew that Carmella wanted something with an uplifting (not sleepy) effect that was easy to grow so this was a simple choice for her.
The Magnum from Buddha Seeds. I have come across other excellent autoflowering plants on my travels however so also include here ones that I would definitely grow again, which I know yield well.
There are a huge choices of autoflowering seeds on the market – it all depends what kind of effect you’re looking for as to what you grow – but some autos are in a different league.
Here are some recommendations based on my experience. (I link to a seed shop called The Vault, where appropriate) which I can confirm are reliable and discreet UK seed bank you can rely on. I have personally used them many times without problem. You should also check out Sensi Seed’s new autos.
Magnum Auto
From Buddha Seeds. This has not disappointed anybody I know and is often found in my garden. It’s a wonderfully reliable plant with an energising creative buzz that will have you tidying up or going for a walk with joyous happiness.
It is also a strong effect – you get so wrapped up in what you are doing that time does pass before you realize you could perhaps have some more of that lovely stuff! So this is really good value and easy to get 1-2 ounces from one plant.
Easy to grow and not a heavy feeding plant. Loves the molasses I found. Also not particularly smelly, except sometimes in drying. A real gem. This is what Carmella grew and loved. More info.
Jack 47 Autoflowering
Jack 47 is really something extraordinary when it comes to yield and speed. The reason to grow this plant is for its very large production.
Within 60 days a huge plant emerges with ounces of extremely sticky bud. I would say it’s totally commercially viable sticky stuff. Decent uplifting high. I would grow it again. I’m sure a lot of people will love it. It does the job. More info
Barney’s Farm Pineapple Express
This plant made quite an impression and was filed under extreme stealth with fantastic high. It does not get big it’s a very squat plant but that might be just what you need.
None of them got bigger than 2ft (in a Smartpot) and each plan produced some really nice uplifting yet heavy hitting weed. You’ll get around an ounce or more each plant without trying too hard. Really nice stuff. More info
Fast Buds Girl Scout Cookies
This variety apparently uses original Girl Scout Cookies cuttings and I have to say I found the high to be one of the most cosmic mind bending indica highs I have ever experienced. The plant grows differently to other autos I have grown and ends up pretty big in the end. Really strong indica hit, basically. Don’t make plans if you are going to smoke this. Fun, super tasty stuff that I would definitely grow again. More info
Sweet Seeds Cream Mandarine
Cream Mandarine from Sweet Seeds – a really satisfying auto that yields extremely well. Very very impressed. The last time I grew this outdoors I was able to yield well over 50g from just one plant. Strong, long lasting high, as good as any photoperiod cannabis plant. Can’t go wrong here.
Step 3 – Get your pots
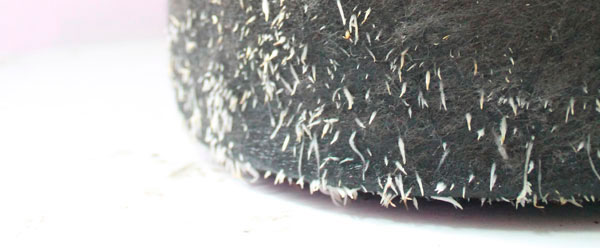
Felt or fabric pots are great I like to use 60litre dirt pots. Anything more is overkill and even this may be a bit much for an auto – some might say. I like the results. You could get away with less.
Using felt pots gives you the best possible plant by preventing root circling and allowing good drainage of the soil which is essential for growing any cannabis. Many people have good results with the taller airpots – it depends on your local climate to some extent but I prefer the smart pot type pot.
When using felt pots I tend to put them on top of something for drainage and so that the roots are not in direct contact with a concrete floor, where the plant will lose heat into the concrete.
Step 4 – Get some soil
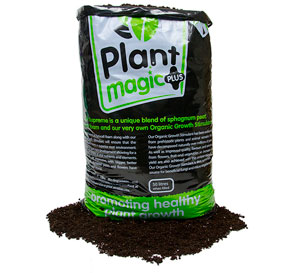
Autoflowering plants don’t need huge amounts of feeding – but they can be fed and some need more feeding than others. If you buy decent quality potting soil that will get you a fair way along the plant’s growth cycle and in some autos cases will be all they need.
Fill your pots up with your chosen soil but do not pack it down. Plant Magic soil is highly recommended in the UK as well as Biobizz Allmix and John Innes No 2. In the US Roots Organic is very well regarded.
I also like to add around 25% perlite to my soil. Please bear in mind that perlite can be very difficult to work with, and the dust it produces is poisonous.
Be really careful when you wrinse the stuff out, which is essential before mixing it well into your soil.
This provides extra air and drainage to the soil. Some auto breeders (Dinafem) also recommend adding 30% coco to your mix, which also adds an extra something to the soil, but is certainly not essential.
If you are serious about growing organic cannabis I cannot recommend enough using Living Soil amendments along with any sort of ‘light mix’ soil.
They work best when left to ‘cook’ for a couple of weeks and these guys even have their own specific autoflowering soil recipie. Well worth it. Check out this page for more details on the best soil for autoflowers.
Step 5 – Drench soil and plant seeds
Some make a bid deal about planting seeds, I like to go for the simple, ‘like in nature’ method. Having totally drenched my soil and let it drain for a while I just throw my seed onto the soil. I then make a small hole 5-6mm deep next to the seed with some kind of small pokey thing (like a match or small twig) and gently push the seed into the hole with the match.
Carefully cover the hole and then leave, making sure birds or other animals can’t access the planting area. Give the area where the seed is a good spray with water every other day. That is all you need to do to get things going.
For protection you can rig up a piece of mesh or a small plastic cup. Birds tend to lose interest after the plants first couple of weeks growth but rabbits can also be a pest depending where you live.
After 4 – 7 days you should see life poking through. You can then start watering VERY gently every other day but never directly onto the new seedling, let its area get wet by watering around it so you aren’t dumping loads of water directly on top of the new plant.
Autos don’t generally like repotting so should always be started in their final container. At least this is the way I used to do it and would still recommend it for people wanting a simple method.
Step 6 – Water your plants – carefully and not too often.
Seeds need a lot of water in their very first few days of life but after that the soil needs to go through the cycle of drying out a bit before you water it again.
Don’t water every day. Try to get a feel for when the plant needs watering again yourself. If you carefully pick up the pot and it feels noticeable lighter then it is time for you to add some water. If the plant is visibly wilting it needs water.
Don’t go crazy with the water at the beginning. While the plant has a smaller root structure its easier to overwhelm it with water, but once the plant is 3-4 weeks old you can really drench the whole pot without any worry. Be aware your watering can make a hole in the top of the soil.
Covering the top of the soil with rocks or small stones can allow you to be a little less careful with your watering once the plant is established. It’s also healthy for the plant to have a ‘mulch’ of dead leaves on top of the soil which can serve a similar purpose.
Step 7 – Feeding
Feed autos nothing but pure water for the first 2 weeks. Always.
If you can leave your water out in the open air to stand for a day or two first, all the better.
After this 2 weeks you can carry on with no extras without problems – however I like to add molasses once every couple of weeks (half a table spoon of black strap molasses dissolved in a cup of boiling water then added to the water in your watering can).
This feeds the microorganisms in the soil and contains many elements sold in expensive nutrients. It is also completely organic.
If you want to grow more demanding strains (like Girl Scout Cookies for example) then you are going to need to have some kind of food.
If you use Living Soil amendments then you just need to add water, no need for Biotabs or any other additions apart from top dressing with the amendment. These guys have schedules on their website.
I can recommend Biotabs in your soil. A really simple organic solution to feeding. I prefer to put these into soil once the auto has actually reached two weeks old and has some leaf and root structure to avoid any over feeding early on.
If you are using relatively small pots then you can get away with using just one Biotab per auto. Put them in the soil at least 6 inches away from the plant after 2 weeks and all should be well. For larger pots over 10 litres I use two. That’s it.
I always have some fish mix on hand in case of problems (it sorts out most issues you could have growing organically though is a bit smelly – just add 5ml to 6 litres of water). The smell goes away quickly. Fish mix really is great stuff, cannabis plants love it. Don’t go over the top though.
You don’t normally need it more than 3/4 times on one auto grow. It contains instantly available foods for the plant and also helps to feed the soil. Be aware of where the water goes that drains from your pots. It may whiff a little bit if you use fishmix.
Step 8 – Harvest and trimming
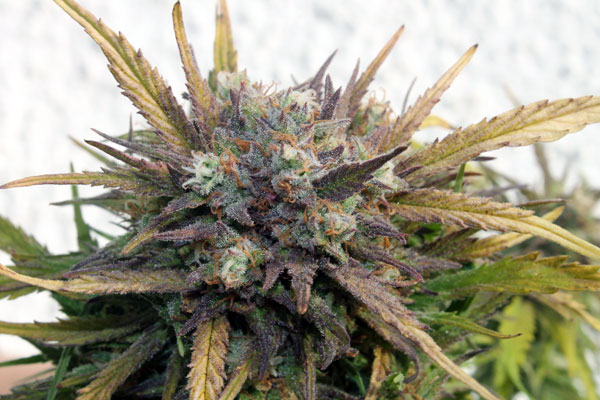
Do not rush this. Here’s a chart showing the correct time to harvest.
This picture shows when the bud is ripe. We see more brown pistils on the flower and a close up view through a microscope will reveal ripe pistils. The bud should have stopped getting any bigger as well as looking like the real thing.
Use some sturdy clippers and make the cut fast.
Trimming.
Trimming is what it says – simply taking off all the excess leaf from around the plant that you don’t need. I like to use a big pair of scissors but other tools are available. Go as close to the bud as you can with the blades but take care not chop off the bud itself. Take your time it’s easy to cut yourself doing this.
You can save the leaves which can be eaten directly or used in edibles. Some of them will have crystals on from the bud so they do have some value, although autos don’t tend to produce huge amounts of leaves.
Now hang your plants somewhere in the darkness where there is at least limited air circulation from time to time. Leave them for 5-7 days.
Step 9 – Curing
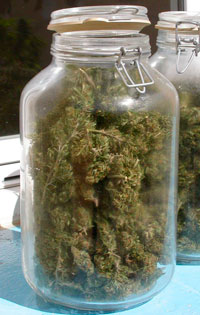
Curing cannabis correctly is an art and can be quite scary if you get it wrong. Infact, if you get it wrong all your weed can get hit with mould, which puts a lot of people off doing it properly. It makes a big difference to the final product though.
The best way to do it is:
Harvest the plants, and hang them in a dark room with a little airflow until they are dry. To test for being ‘dry’ you need to locate a thin branch, one which is just a few millimetres thick, and try to snap it. The bud should feel dry to touch.
Once you can properly snap a thin twig, not just bend it, then it is time to remove the buds from the plants and then for the weed to go into glass jars.
Don’t rush this, make sure you can do a proper ‘snap’ or the weed may be too wet to start the curing process and could go mouldy!
Seal the weed in glass jars, then once a day open the jar for 10-15 minutes or so, enough for the weed to breath. Move it around and ensure all buds get exposed to some air. You should smell some pleasant terpenes at this stage as the weed is reaching its perfect stage.
For the first week in jars do this three or four times per day. This is when the weed will be at its wettest.
After the first week you can go down to one burp a day.
Keep ‘burping’ the jars for 2-3 weeks or until the weed seems dried without being powdery and then you can properly seal them for a year or two or start smoking it!
Other tips
If your plants get hit by heavy rain during flowering (not early flowering but later once bud has formed) then it is a good idea to gently shake the plant out a bit after the rain has stopped to get the moisture out the buds, to avoid mold.
Shake it from side to side as much as you can without harming it.
Explode yields with Autowatering Planters!
I’ve now done a couple of runs outdoors using Lechuza auto watering planters and can thoroughly recommend them. I have been using the 16 litre ones and won’t be growing autos in anything else from now on, having made this discovery, they definitely outperform Smartpots.
All buds come out at their very best using these pots. No popcorn, just really nice well rounded buds.
There are specific auto planters created for cannabis known as autopots, but anything that auto waters will do the business. You could even just make a Hempy Bucket.
The important thing I found with the Lechuza pots is to ensure that the roots are well established before filling up the reservoir.
Make sure the plant has been growing for at least 3 weeks since the first leaves emerged.
If you don’t do this you’ll end up with an overwatered plant. I have noticed when using the Lechuza pots that it is possible to add a lot of water and prematurely start filling the reservoir.
Try to avoid this in the early stages by watering gently and watching carefully. If you do over-do it you can syphon off extra water out of the fill hole in the reservoir to prevent overwatering.
The Lechuzas also require regular topping up during flowering, you may be surprised how much water will be used in one day.
If you found Carmella’s case study inspiring, I’d really appreciate if you would share her story. I hope this guide helps you out. If you don’t have green fingers you can always buy weed online.
I’d also love to hear from you: do you have any top autoflowering growing tips?
Leave a comment and let me know yours.


Hi, thanks for auto tips very helpful. Can I ask About liquid sea weed, I used this on my first auto after 4 weeks 5th May. She has gone into flower 6th June. What should I put on her to help? I only wanted a small plant to start with the pot size, is a tall rose pot. Plant just 2 feet which is what I wanted. Have 25% perlite to compost. with 10 hours full sun. Thanks For any tips..
I haven’t used the seaweed much myself though I know many swear by it so can’t really say. At the later stages I only tend to use blackstrap molasses.
hi Andy, Thanks For the help. I can’t get the molasses here at the moment. I have given her a drink with the sea weed. All seems to be going well. I am a bit green when it comes to blogging ect. I have loved reading all the things on the site. Kings kesh is the auto that I got from seedsman for the cbd 1to1. they seem to like it here, Fingers crossed.
No worries, sure it will be fine. Just make sure you just give pure water for the last couple of weeks
Have had this article saved for a while and finally a new year, will deffo be attempting a few autoflowering strains this year, any tips for a first time grower? Sick and tired of sending my hard earned money for weed that is terrible, would rather spend 100 every now and then on seeds